Field trips are great. They're a chance to get out of the classroom and help your students experience something they are learning about first hand. But, because of cost or location, we can't always go on all the field trips we'd like to go on. For this reason, virtual field trips are great! If you have a projector or an interactive whiteboard (hooked up to your laptop or computer obviously), you can go on a virtual field trip.
Here's a few that I've used:
Ellis Island Tour- We've been learning about immigration in the late 1800's and early 1900's. This activity from Scholastic provides a great interactive "tour" of Ellis Island. There are real photographs, videos, and documents from the island.
Underground Railroad- Another great resource from Scholastic! This one takes you on a journey on the Underground Railroad. There are some great pictures with this one. And if you use the audio, it is read from the escaping slave's point of view. Very engaging!
Here's a few others:
AfriCam- This would be great if you were studying animals, habitats, etc. This website has live streaming video of different animals at a Bush Lodge in South Africa. A downside to this one would be the time difference. When I was exploring the site, it was about 2AM there and there was not much visible on the cameras.
The Louvre- A field trip to France might be too expensive, but that shouldn't stop you from exploring the Louvre with your students from your classroom. The Louvre's website offers a virtual tour. You can explore the art and architecture of the Louvre online for free!
Museum of Science- The Museum of Science (in Boston, MA) offers virtual exhibits that can be viewed and explored through your computer.
My suggestion: Google "virtual field trips" or "virtual field trips for kids" or "virtual field trips for <subject>" and see what comes up. Also check out the websites for all those places you'd LIKE to go, but probably couldn't make it to and see if they offer virtual tours. Even if you don't have it in your budget to take your kids out the building for the day, you do have the budget to take them on a virtual field trip (FREE!).
Monday, May 2, 2011
Thursday, April 21, 2011
$40!!!!
While at the MSET conference last week, I attended a session on low-budget tech tools. They had some great ideas for how to get/make some items that typically cost hundreds or thousands of dollars, including interactive whiteboards and document cameras. I am fortunate enough to be in a school where I have an interactive whiteboard in my classroom, so I won't be sharing that tidbit in this post. However, feel free to leave a comment if you're curious!
What I thought was pretty cool was that these people MADE a document camera! This is a tool that I have kinda sorta dreamed about having in my classroom. I even attempted to get one through Donorschoose.org, but was unsuccessful in raising the funds (insert sad face with a tear here!). When I saw the materials used to make the document camera, I slapped my forehead and thought, "DUH! It's so easy! Why didn't I think of that before?!" The example they had brought to the presentation used PVC pipe for a base and a webcam mounted near the top. I instantly knew that I had to make one. So taking advantage of my time off from work for Spring Break this week, I got together with a couple of friends and we made document cameras. I did a little bit of research before we got together though and saw that there were, in fact, other ways to make a document camera that would not require the amateur carpenter in me to make an appearance. Being a fan of the KISS philosophy (that's Keep it simple, stupid!), I went for the much simpler method. All you need is about $40, a trip to Target, about 10 minutes at home, and VOILA! You too can have your own document camera!
Shopping list:
 a desk lamp- the one I purchased was $20 at Target. You want it to be reasonably tall and if the post is kinda bendy, that's a plus too! Don't go for the short little type. Size matters if you want to project something larger than a post it!
 a webcam- this one cost me $20 on sale. I believe the normal price is around $30. Either way, it's a cheap webcam that still had great reviews online (yep, I did my research before I went out and bought this!) and when I plugged the camera into a computer it had a great picture.
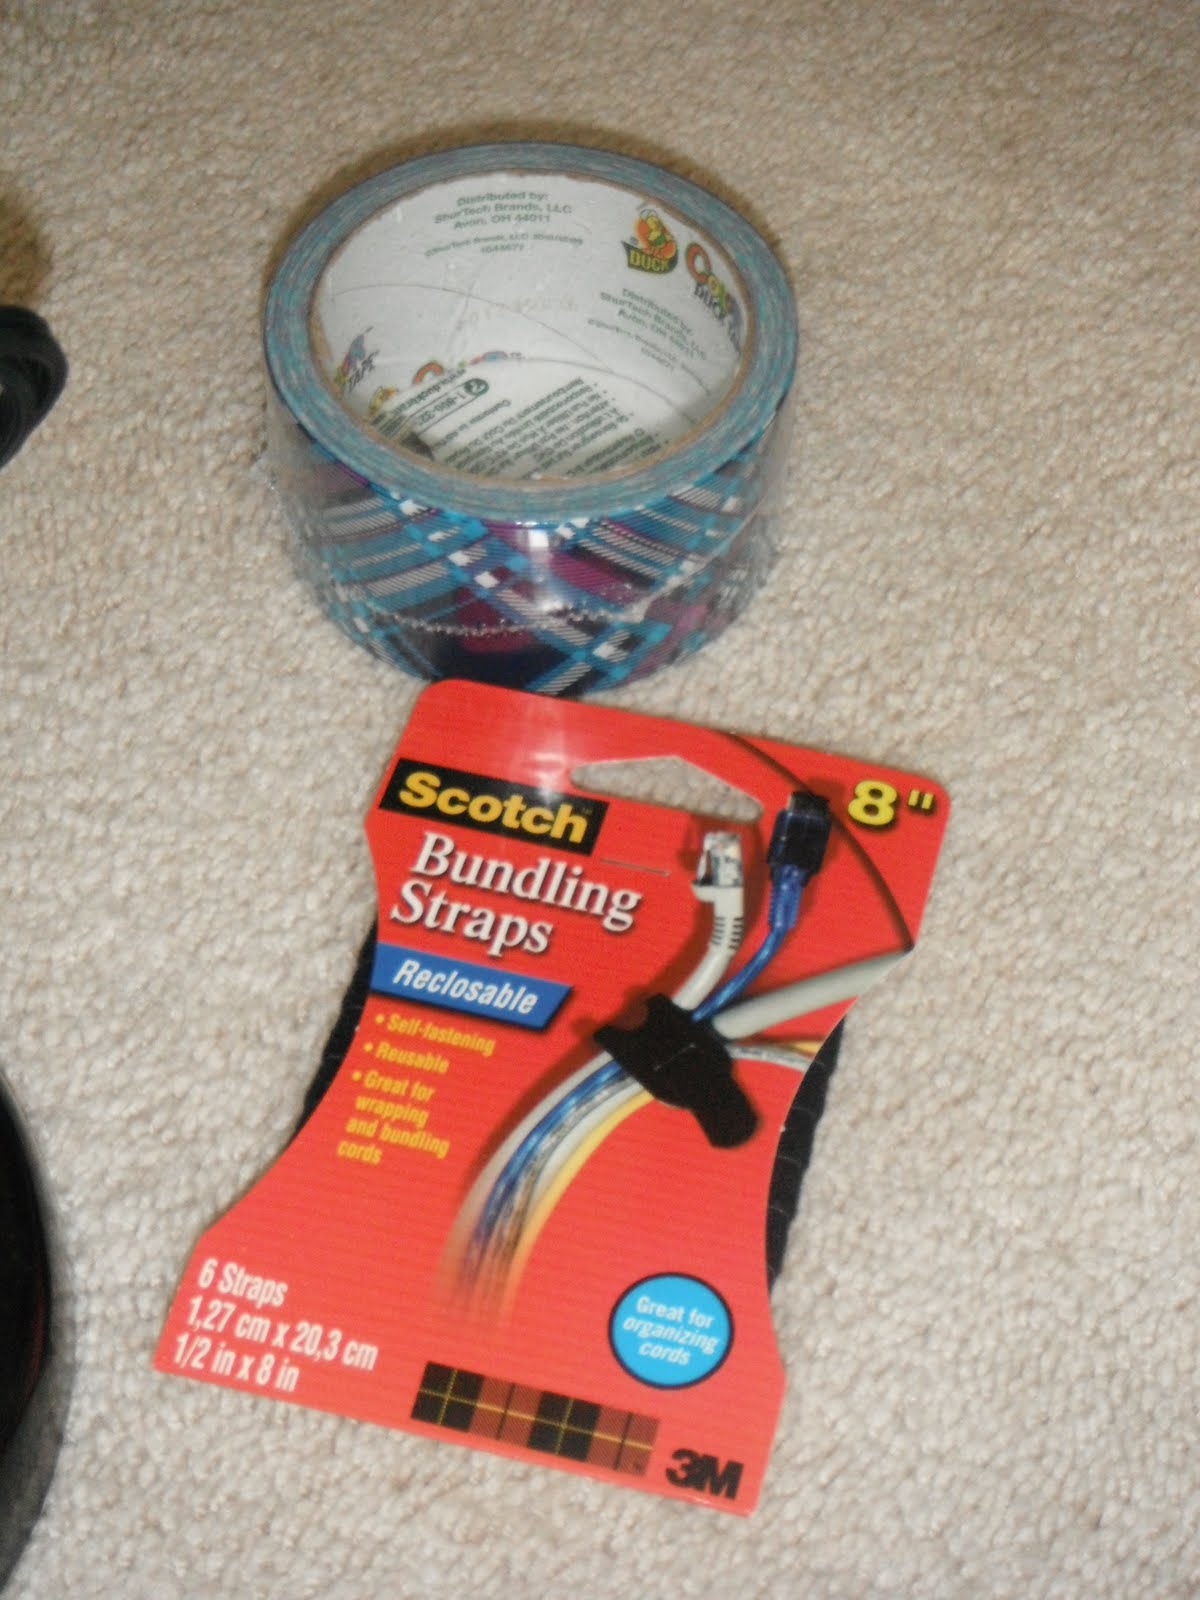
 bundling straps, duct tape, or plastic zip ties to mount the camera to the lamp. Target did not have plastic zip ties, so we got the bundling straps instead and they worked great. We used the duct tape to hold them in place so they didn't slide up and down the post of the lamp. And yes, this was a group of girls so we got the pretty plaid purple and blue duct tape.
To assemble it, take the webcam out of the packaging. Use the bundling straps to fasten it near the top of the lamp right under the shade. Use the duct tape to secure the straps in place and keep them from sliding (which will also help keep your camera steady. Now you also have an awesome document camera!

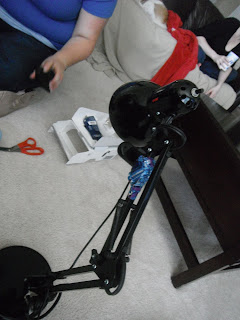
I spent $40 on something others have spent $600 or more on! And even though I am enjoying Spring Break, I really can't wait to take this thing to school to show off to my kids and the other teachers!!!
What I thought was pretty cool was that these people MADE a document camera! This is a tool that I have kinda sorta dreamed about having in my classroom. I even attempted to get one through Donorschoose.org, but was unsuccessful in raising the funds (insert sad face with a tear here!). When I saw the materials used to make the document camera, I slapped my forehead and thought, "DUH! It's so easy! Why didn't I think of that before?!" The example they had brought to the presentation used PVC pipe for a base and a webcam mounted near the top. I instantly knew that I had to make one. So taking advantage of my time off from work for Spring Break this week, I got together with a couple of friends and we made document cameras. I did a little bit of research before we got together though and saw that there were, in fact, other ways to make a document camera that would not require the amateur carpenter in me to make an appearance. Being a fan of the KISS philosophy (that's Keep it simple, stupid!), I went for the much simpler method. All you need is about $40, a trip to Target, about 10 minutes at home, and VOILA! You too can have your own document camera!
Shopping list:


To assemble it, take the webcam out of the packaging. Use the bundling straps to fasten it near the top of the lamp right under the shade. Use the duct tape to secure the straps in place and keep them from sliding (which will also help keep your camera steady. Now you also have an awesome document camera!


I spent $40 on something others have spent $600 or more on! And even though I am enjoying Spring Break, I really can't wait to take this thing to school to show off to my kids and the other teachers!!!
Wednesday, April 13, 2011
Brain overload!
If you have not yet had the chance to go to a conference, find one and go! I spent the last three days attending MSET and it was an AWESOME learning experience! I came away with more information than I could possibly post right now. Look for some posts in a few days to share some of the cool things I learned! Have a great night!
Monday, April 11, 2011
ToonDoo

http://www.toondoon.com--
(BCPS teachers, this website is currently blocked by WebSense.)
Voki!

I am at MSET- using Web 2.0 tools in the classroom workshop and this is the first tool we got to play with! It's pretty neat and FREE!! Check it out: http://www.voki.com
Possible uses:
*Leaving a message for your students if you are out and have a sub
*Have students post responses to different questions/problems- this is way more engaging than just writing it out!
*Kick off a lesson in a new, fun, and interesting way by showing a Voki!
Sunday, March 20, 2011
Blog with a Purpose!
If you know me, then you know I am obsessed with technology in the classroom. If I had to pick my favorite item in my classroom, it would be my Promethean ActivBoard. I mean, really, if I ever leave the school I am currently at, you might see the ActivBoard strapped to my back as well. This obsession is also what drove me to pursue my ED.S in Educational Technology. I am a nerd when it comes right down to it. When I recently asked my principal for permission to attend the MSET coference in April, I was so giddy when she approved that I did not walk out of her office, I bounced out of it like an out of control ping pong ball. I was possibly more excited about that than I was about attending Happy Hour that evening with my coworkers (who I love!!). So my goal for this blog will be to share all the wonderfully nerdy, techy stuff that I learn about how to use technology in the classroom. And I hope I can make someone else just as nerd-fully excited to use these tools as I am!
Subscribe to:
Posts (Atom)